How to fill Loksewa aayog Online form ?
Loksewa aayog online form Required Documents
To fill-up the form, you must have these documents:
- Academic Certificates (all academic certificate SLC, +2 or Bachelor, etc.)
- Training Certificates (If you have any)
- Professional Council Report (Medical Council Report required only for Health Service related post)
- Passport size photo
- Scanned Signature
- Citizenship
- Inclusion Group Certificate (Dalit, Aadibasi/Janajati, etc.)
- For creating a new account, follow the steps given below.
Steps 1. Creating User Account Applicant Login Page This is the homepage for applicants (before login).
User can use the general services shown without registering in the system. For using rest of the services applicant has to create an account.
Steps: Double click on or or or other search engine icon to open the browser.
Enter the URL in the address bar as www.psc.gov.np
Click on the online application button appearing in the home page. System will open the PSC Homepage for applicants

Steps 2. Create applicant Login
This page will allow user to create a user account by registering themselves with the system. User has to create a Username and Password for login. User has to enter his/her personal details also in the process of registration.

Click on Sign Up tab System will display the registration page
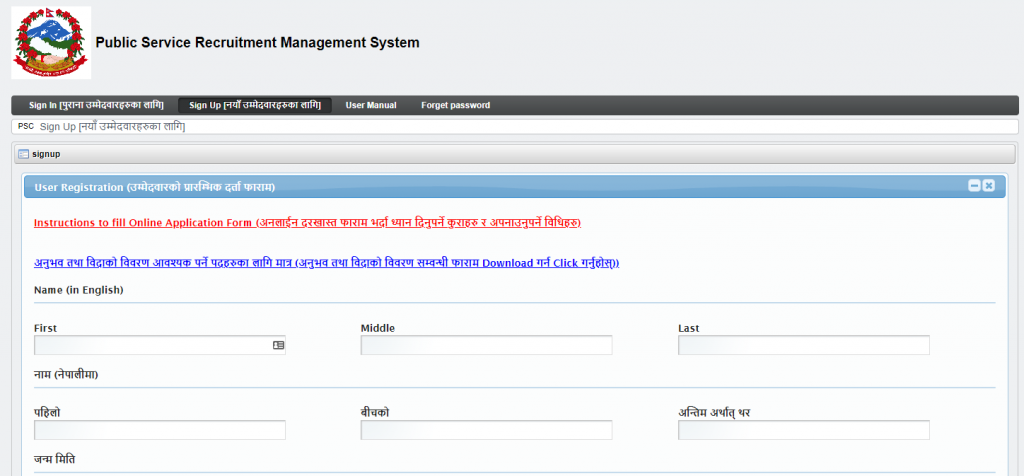
Enter the details / Select the entries to be made
Click on save button. Confirmation message will be displayed in a secondary window as shown below:
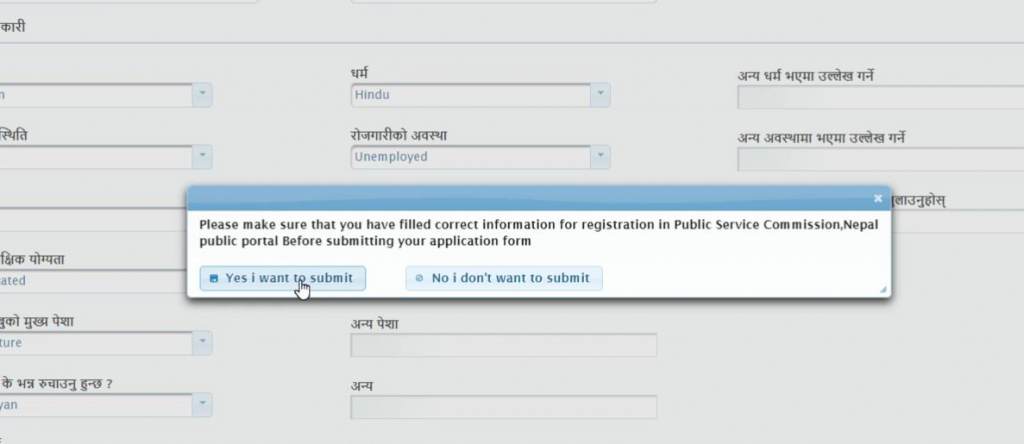
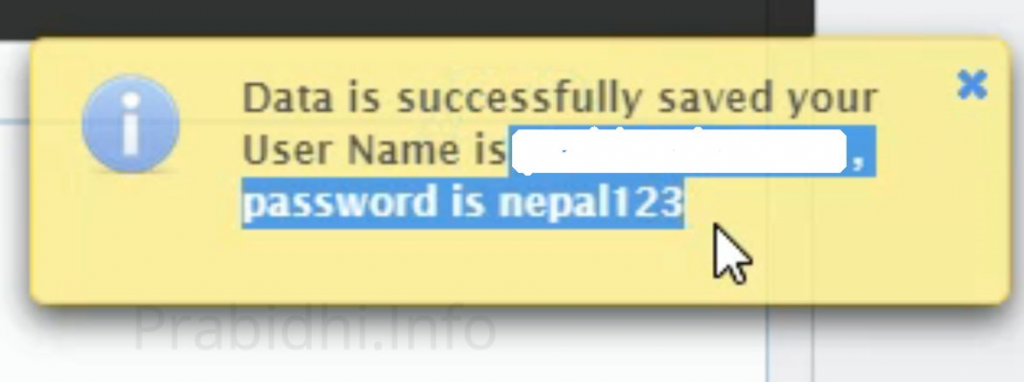
Registration Process will be accepted if user clicks on Yes I want to submit button. The below page will be displayed with confirmation message with your user name and password.
User name and password will be sent to the applicant’s mobile number specified in the registration process.
The registration page remains, as it is if user clicks on No I don’t want to submit button.
Creating New Password To change/ reset the password generated by the system, the below given steps need to be followed:
Click on the Sign In link (with a key icon)

Enter the User / Screen Name in user name field
Enter the password in the password field
Click on the Sign In button New Password page will be displayed as shown below:

Applicant may create his/her own new password
Enter new password in the Password field
Enter the same password in the Enter Again field. Password should be minimum 8 characters long and maximum limit should be 30 characters Password should have at least 1 special character and 1 number and 1 alphabet Data in Password and Enter Again field should be same
Click on Save button.
Password Reminder questions and their answers are mandatory.

Click on Save button to complete the Applicant Login This page allows all registered applicants to ‘login’ the system.
Applicant Homepage (After Login) This page will show the list of tabs applicant can use to enter his/her details for applying. Personal Details Tab:


Enter the details /Select the entries to be made
Click on Next button Additional Details Tab page will be displayed as shown below:

Enter the details /Select the entries to be made
Click on Next button Contact Details page will be displayed as shown below:

Applicant should fill the Contact Details to go to Next page
Enter the details /Select the entries to be made
Click on Next button
Education Details page will be displayed as shown below:

Back button: For updating previous tab details, applicant can click on Back button.
System will take user to previous page for updating details.

By clicking on Add New Details button, secondary window will be displayed for entering education details.


The above page will allow user to enter his/her educational details
Enter the details /Select the entries to be made.
Click on Save button. The following screen shot shows the confirmation message of education details information.

By clicking on Add New Details button, secondary window will be displayed for entering Training details.

The above page will allow user to enter his/her educational details
Enter the details/Select the entries to be made.
Click on Save button.

Now the Medical Council page will be displayed as shown below:
Candidates applying for the posts related to Health Service need to fill the required details .
For others it is not required.

Click on Next button as shown below. Now the Experience Details page will be displayed as shown below:


Select / Enter the correct information.
Click on Save button to save the information. Or Click on [X] button to close the current page System will close the current page and return to the Homepage
The saved information / details will be displayed below the Government section as shown below:


Click on Upload or Replace button under “Upload Your Scanned Photograph” section.
Click on Choose option and select scan photograph from secondary window.
Click on Upload button.

Applicant has to upload his/her scanned signature.
Click on Upload or Replace button under “Upload your scanned Signature” section.
Click on Choose option and select scan photograph from secondary window.
Click on Upload button. The uploaded information/ details will be displayed as shown below:


Select and Click on the relevant Advertisement code
The selected code will be displayed as shown below


candidates can see the examination center according to the advertisement code
Click on the Terms and Conditions check box.
Click on the Submit button Application Submission Confirmation will appear as below. This confirmation is required while exam fee payment and admit card generation.

Candidate should keep this receipt safely. Fee Payment
Candidates’ application will not go for scrutiny process until the payment is not done. For payment candidates can go to the nearest Public Service Commission office.
Candidates need to give their Master ID and the required fee to the cashier . The cashier after having the required amount will make payment by the system and provide a copy of cash receipt. Keep Safe the receipt.
Admit card Generation For admit card generation .
Sign in to your account . click on the home menu the following window will appear.

click on the radio button of Payment Status menu and select the completed and click on search button

The following window will appear. The candidates can see the advertisement code for which their payment has been completed. Click on the Admit card view .

If the scrutiny is completed and if candidates form is accepted , the candidate can view the ADMIT CARD as follows with the applied advertisement detail, roll number and name of the authorized scrutiny officer.

if the scrutiny is under process the candidate can view the provisional admit card without Roll no. Candidate need to print the Final admit card with Roll number, which they must bring for participating in the related examination
Follow these steps & fill your loksewa aayog online form.
For More Loksewa Notes Find here
You can also check here PDF Format

